MERN Stack Application Development.
We can divide a MERN stack application into 2 parts as client-side & server-side. Basically client-side consist with React and server side consist with Express, Node & MongoDB as a Database.
For the simplicity, we can divide this into steps as,
- Arrange folder architecture
- Create React application
- Install relevant front-end dependencies
- Initialize back-end
- Create back-end files
- Install relevant front-end dependencies
- Create & run back-end server
- Connect to MongoDB
- Add a model
- Add route file
- Import routes to server
- Use React components
- Add React components
- Add navbar
- Add Routes
- CRUD operations
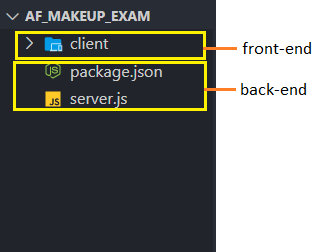
1. Arrange folder architecture
We need to separate front-end files & modules from back-end contents, since they have no dependencies and also for best practices. We can put these 2 contents into separate folders or put one inside folder and other in root directory.
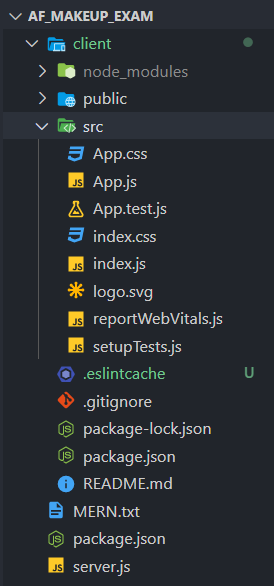
2. Create React application(front-end)
Now we need to navigate into client folder & create React application inside it. Necessary commands,
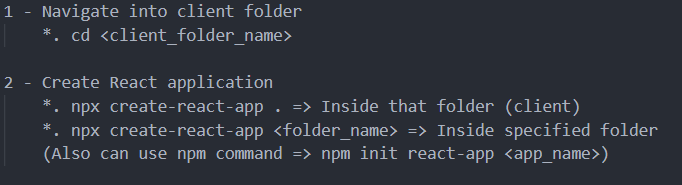
Now, React application is successfully created & we can run it using npm start command.

3.Install relevant front-end dependencies
We need to install necessary dependencies/ modules inside front-end for further implementations using npm install or npm i command.

4.Initialize back-end
Now we can add necessary implementations to back-end structure. We need to navigate back into root directory (or sever folder) and initialize back-end using npm init.
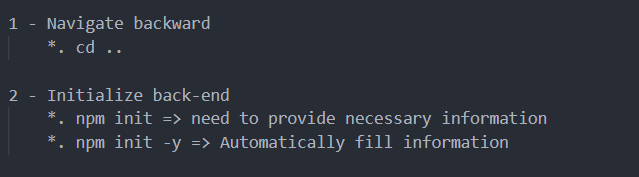
This will create a package.json file with application data.
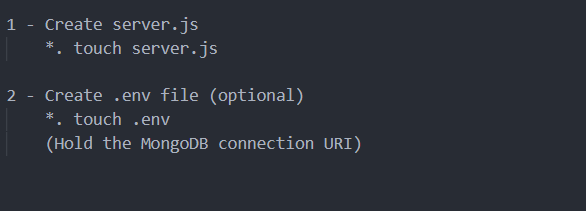
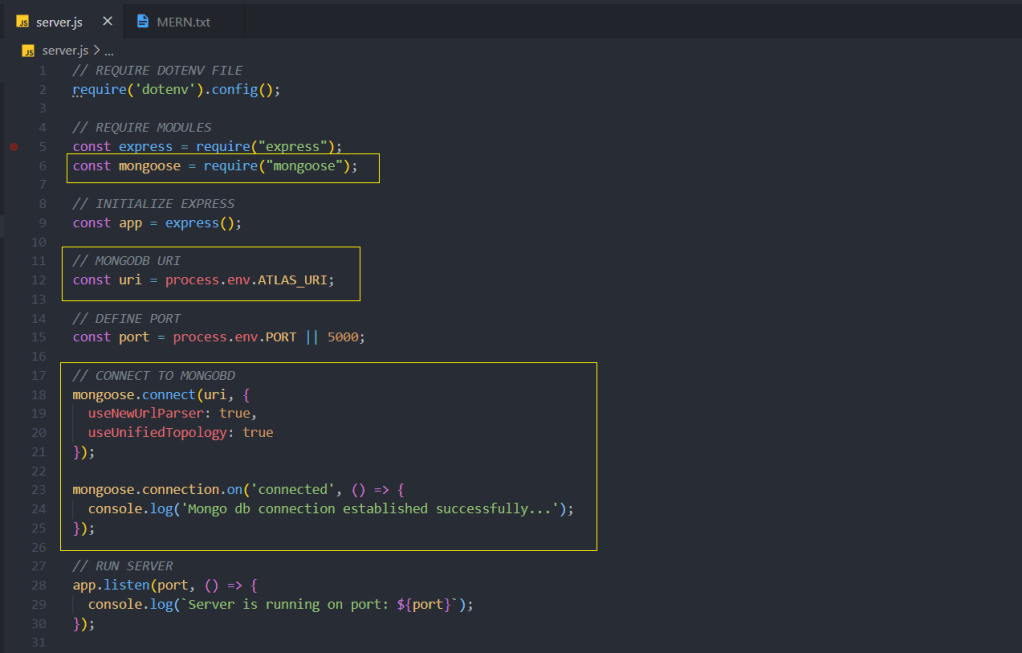
5.Create back-end files
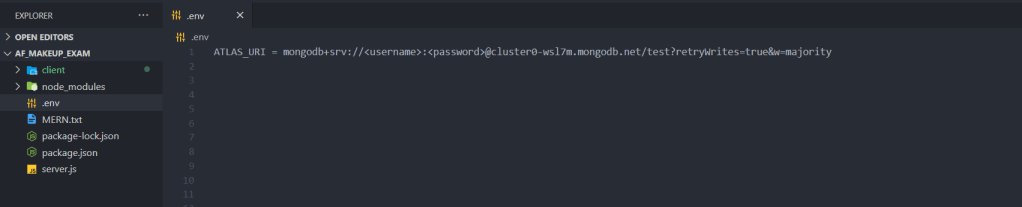
Now we can create necessary back-end files to create & run back-end server. Firstly create a js file to create server & then create .env file to add MongoDB connection URI(optional). Necessary commands,
We can add MongoDB URI used to connect application to MongoDB, inside .env file & import it into server file.

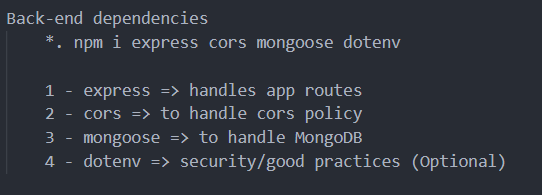
6.Install relevant front-end dependencies
Then we need to install necessary back-end dependencies using npm install command.
7.Create & run back-end server
Steps to follow for create & run the server.
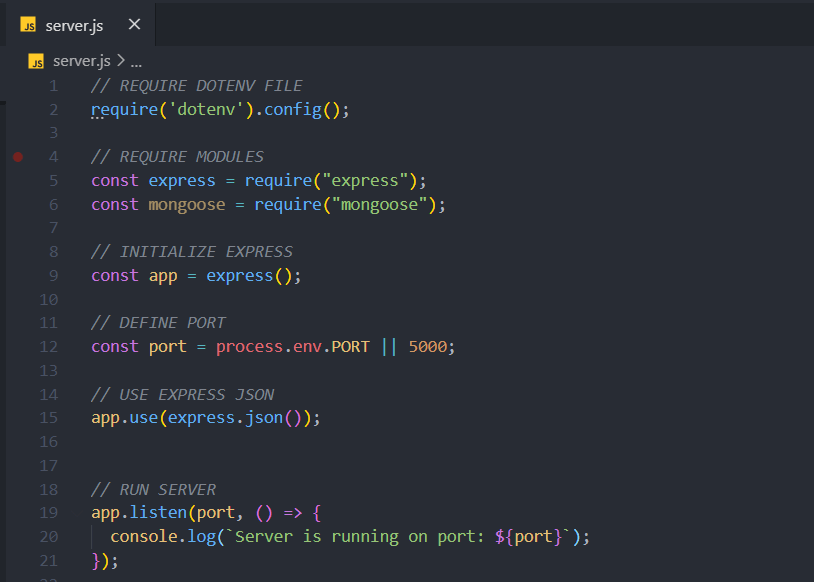
Then run command node <file_name> to run the server. It will show the message with running port.
8.Connect to MongoDB
Add mongoose module, import MongoDB URI from .env file, connect server to MongoDB. After re-run the command node <file_name> it will show the success message for connecting MongoDB.
We can prevent re-run when update the file using nodemon module. for that we can use npm install -D nodemon command. It will automatically run the server when server file updated & saved. After installtion of nodemon we need to run the server file using nodemon <file_name> instead of node <file_name>.It will automatically start the server.
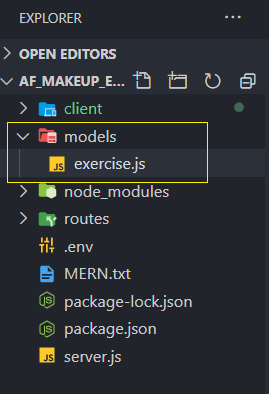
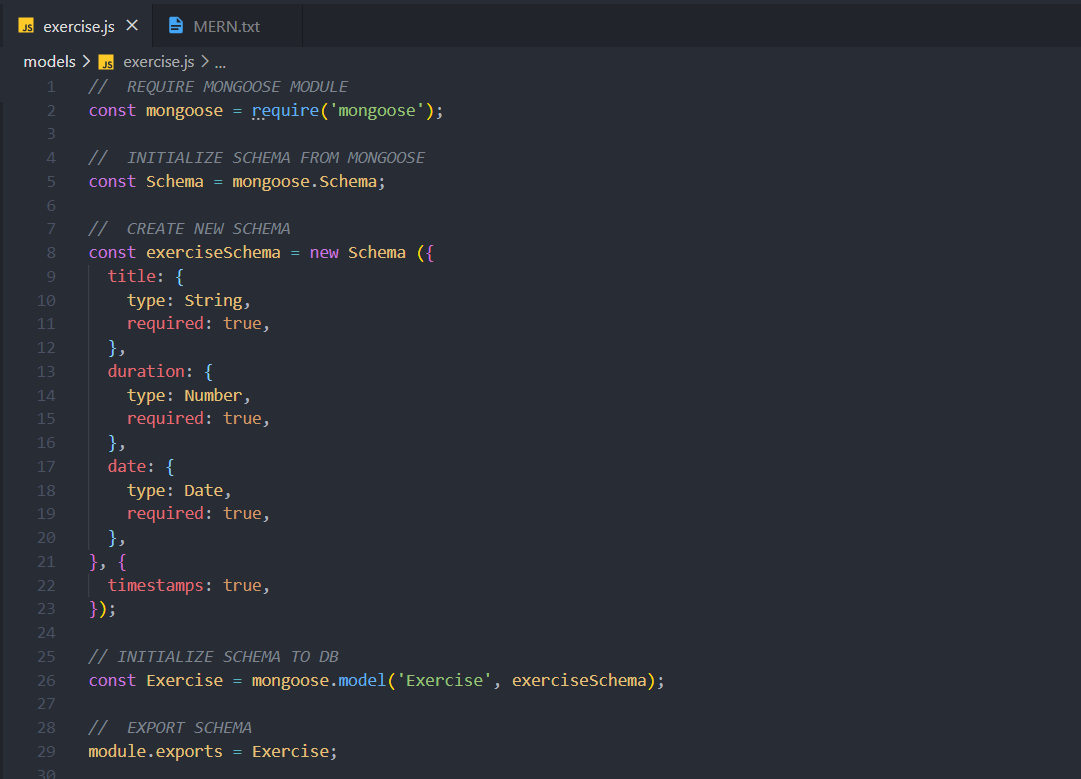
9.Add a model
In order to add data to database we need a model. We can create a folder called models & create a model inside it.
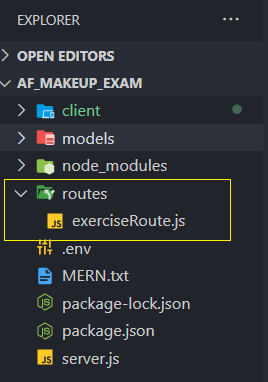
10.Add routes
We need to add routes to perform necessary actions(CRUD operations) using our model. We can create separate folder called routes & add route files inside it.
11.Import routes to server
To use these routes we need to import them from server file & use it inside server application. We can import any number of routes like this by creating separate models, routes files.

Now the back-end process almost done & need to implement front-end with connecting back-end.
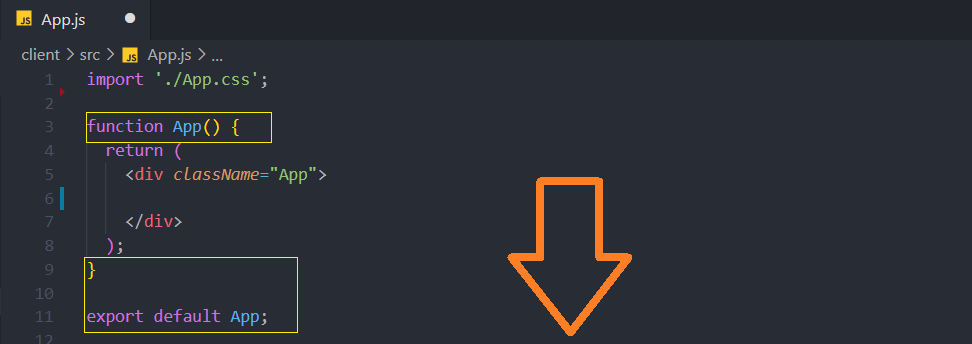
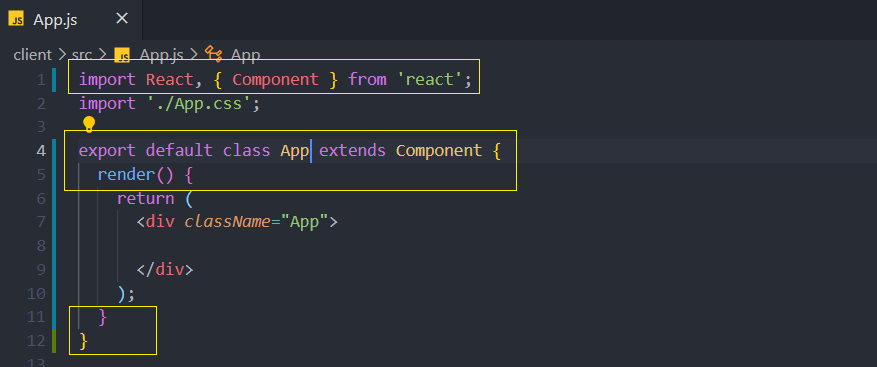
12.Use React components
We can use React class component instead of functions to build our application.
13.Add React components
Now we can add Recat components as necessary. For the best practices we can store them inside a separate folder as components in src folder and import from there.
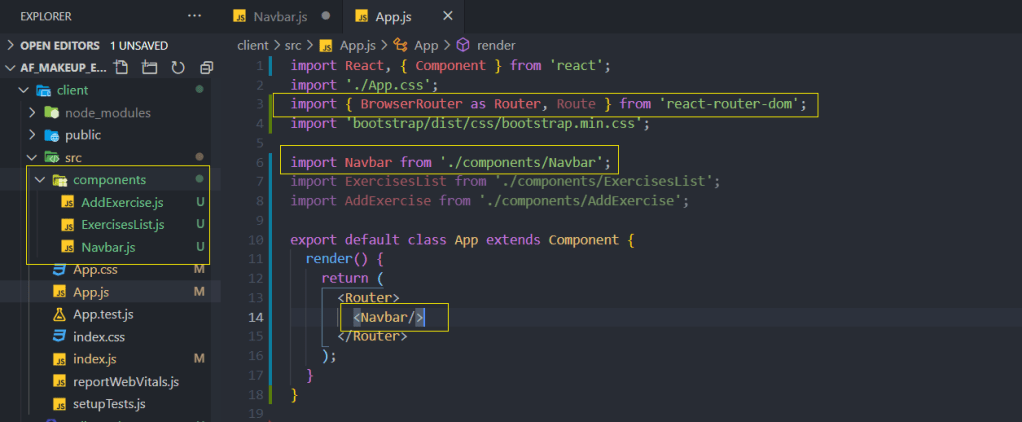
These components needs to added inside Router element from react-router-dom.
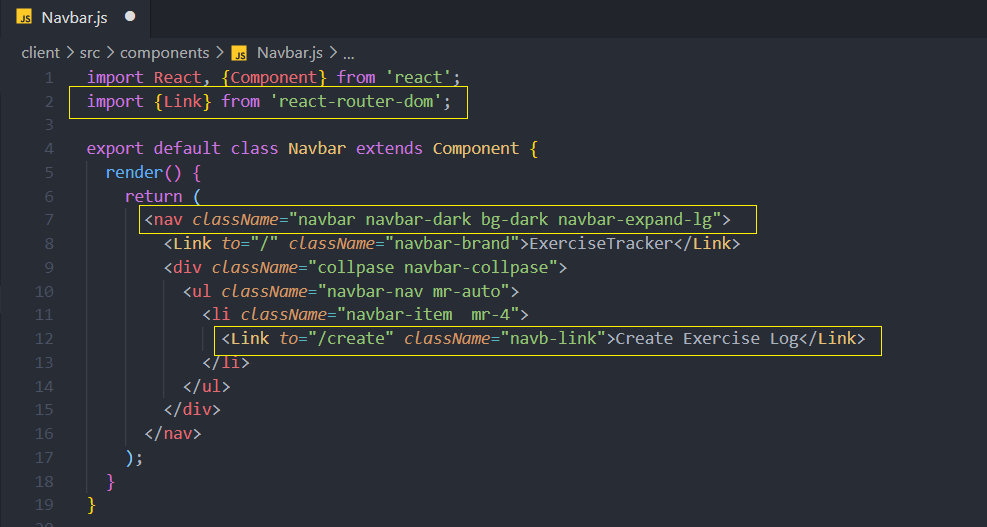
14.Add navbar
We can add React nav component & make changes to it. Also we need to add Link attribute from react-router-dom for navigations links.
15.Add Routes
We need to add routes of other components with their path, inside App.js using Route component of react-router-dom to navigate through them.
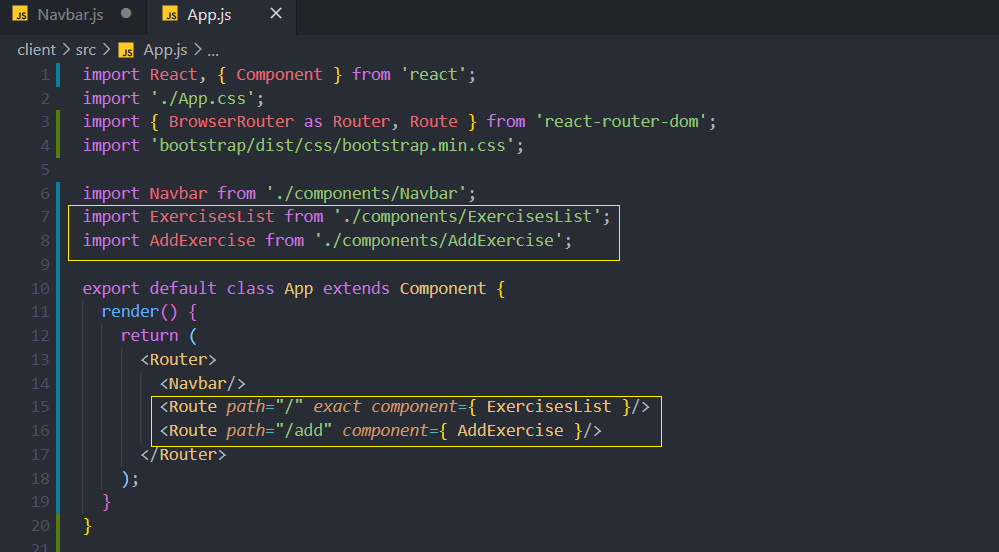
exact is used to specify the root component of the application inside Route.
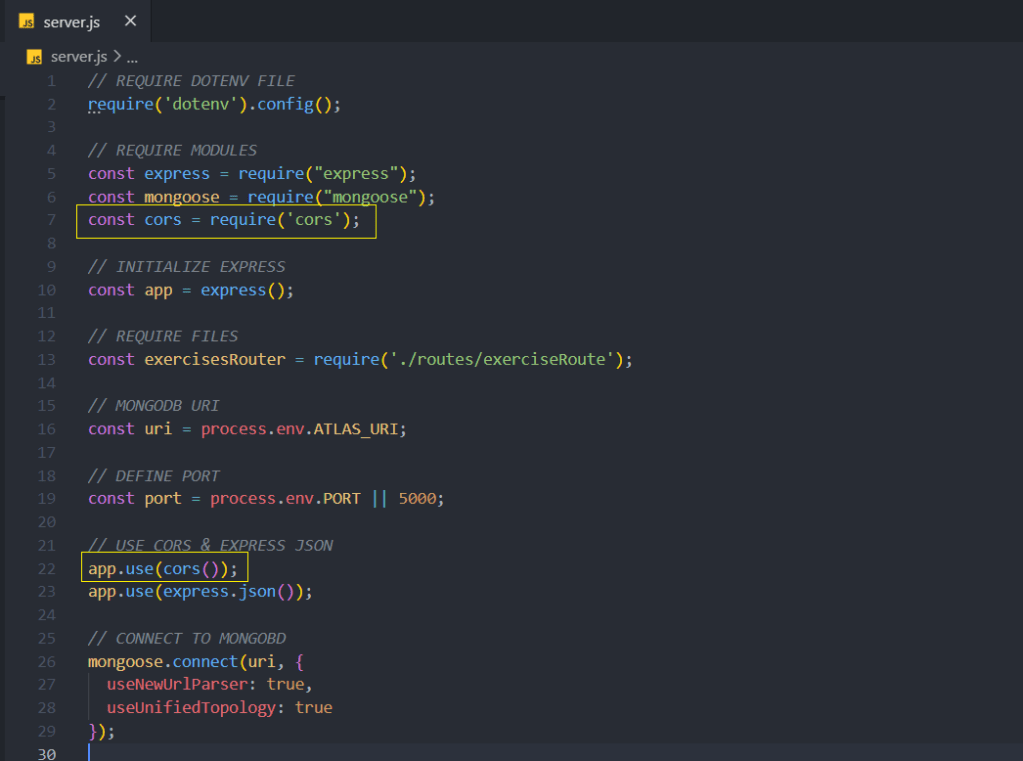
16.CRUD operations
Since back-end & front-end running on 2 different ports, we need to avoid cors policy before getting or sending data form back-end. We use cors module previously installed for that.
Now we can add React file component to display data(Exercises).
Follow My Blog
Get new content delivered directly to your inbox.
